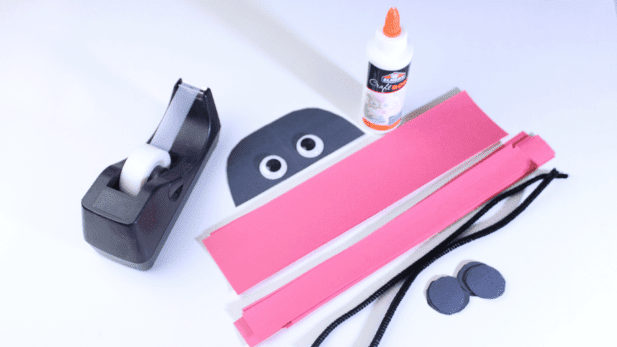
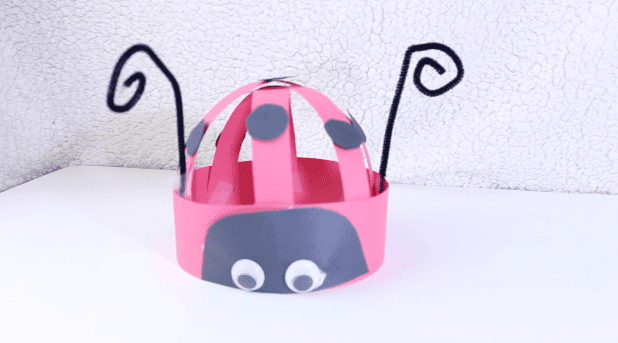
Have you ever wondered where the lady bug got her name? Wonder no more, I’ll tell you the legend. Hundreds of years ago in Europe, farmers prayed to the Virgin Mary for help because droves of aphids were destroying their crops. Help came! Pretty little red beetles with black spots, acting as pest control, devoured the aphids, saving the crops. The people referred to the beetles as their lady’s bug and eventually the term derived into ladybug. Fun right? Now to have some fun with a lady bug craft! This cute little hat is simple for little fingers too.
Materials needed:
- Glue
- Tape
- 2 black pipe cleaners
- 2 1/2”-2” strips of red paper
- 8-10 1” strops of red paper
- Black dots
- D-shaped black cut out
- Googly eyes

Steps
-
- Tape or glue the the large strips of paper together to make a circle the length you desire.

-
- Attach smaller strips to circle, and opposing ends to the opposite side, as shown in the picture.

-
- Attach D shape to the base of the hat to make lady bug head and glue on googly eyes.

-
- Glue on dots to the ladybug’s back.

-
- Shape and tape antennae to the inside rim of the hat.

- There you have it! All ready to wear!

Here’s a video of a local artist creating a different type of laydbug craft!
Lady Bug Rock Painting – The fun side of bugs!
